Upload data to your Archive
Follow these steps to upload data to an Archive on the FarEarth orders page.
Prerequisites
- You need to have access to a FarEarth subscription
- Permission to create new Pickups, Workflows and Archives
- You will require a Pickup and an Archive
Step 1
- You need a Pickup to be able to ingest data. See how to add a Pickup for instructions
Step 2
- You need an Archive to store the data. For instructions on how to create a new Archive, see how to add new Archives
note
Make a note of the ID of the Archive where you want to store the data.
Step 3
- You need to create a Workflow that stores data directly in your Archive
note
The instructions below will guide you through creating a Workflow specifically for storing data in an Archive. For general instructions on how to add a Workflow, see how to add new Workflows.
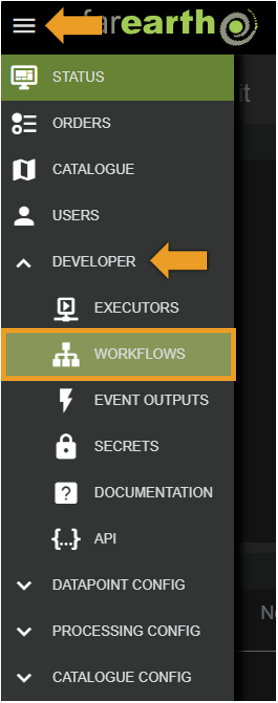
- Click MENU
- Click DEVELOPER
- Click WORKFLOWS
Step 5
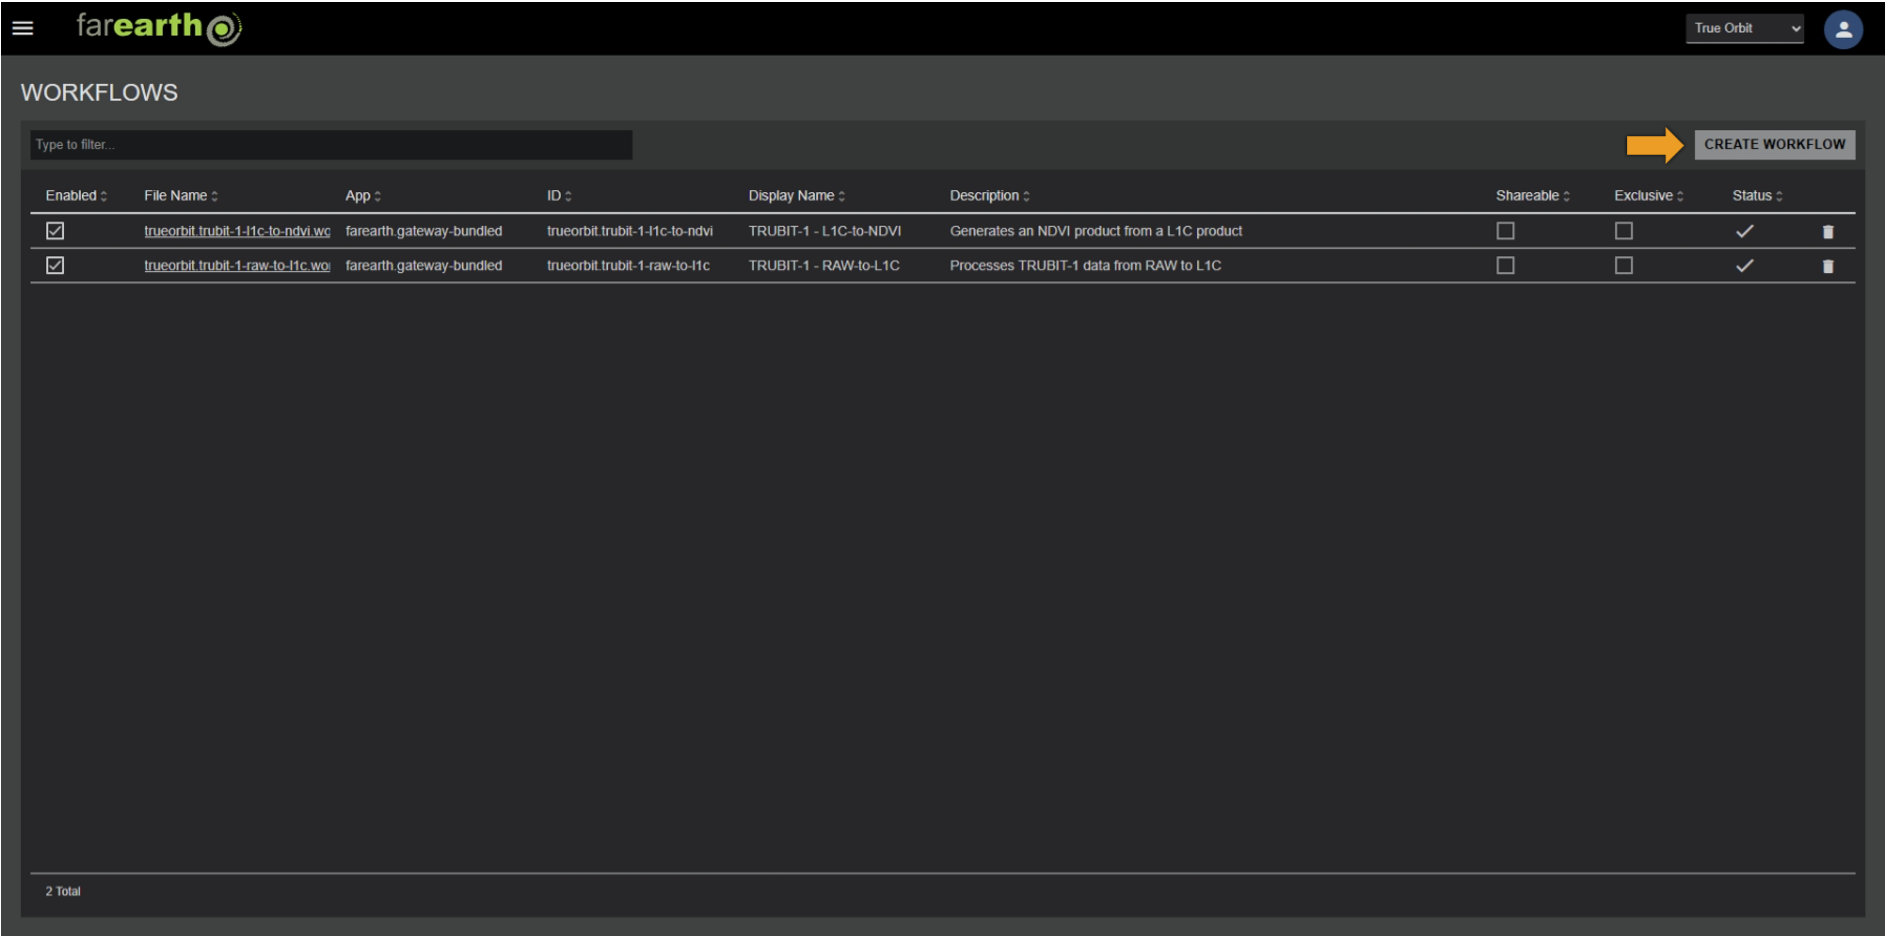
- Click CREATE WORKFLOW
STEP 6
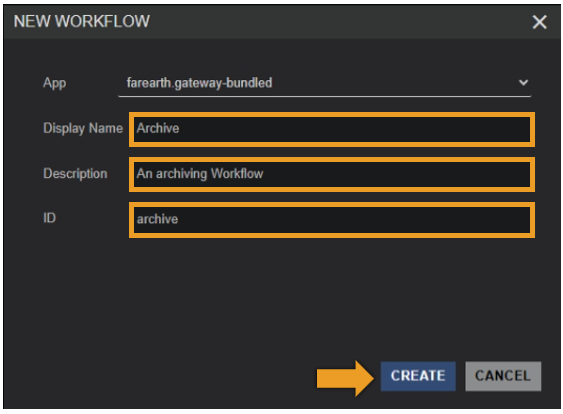
- Enter a Display Name
- Enter a Description
- Enter an ID
- Click CREATE
STEP 7
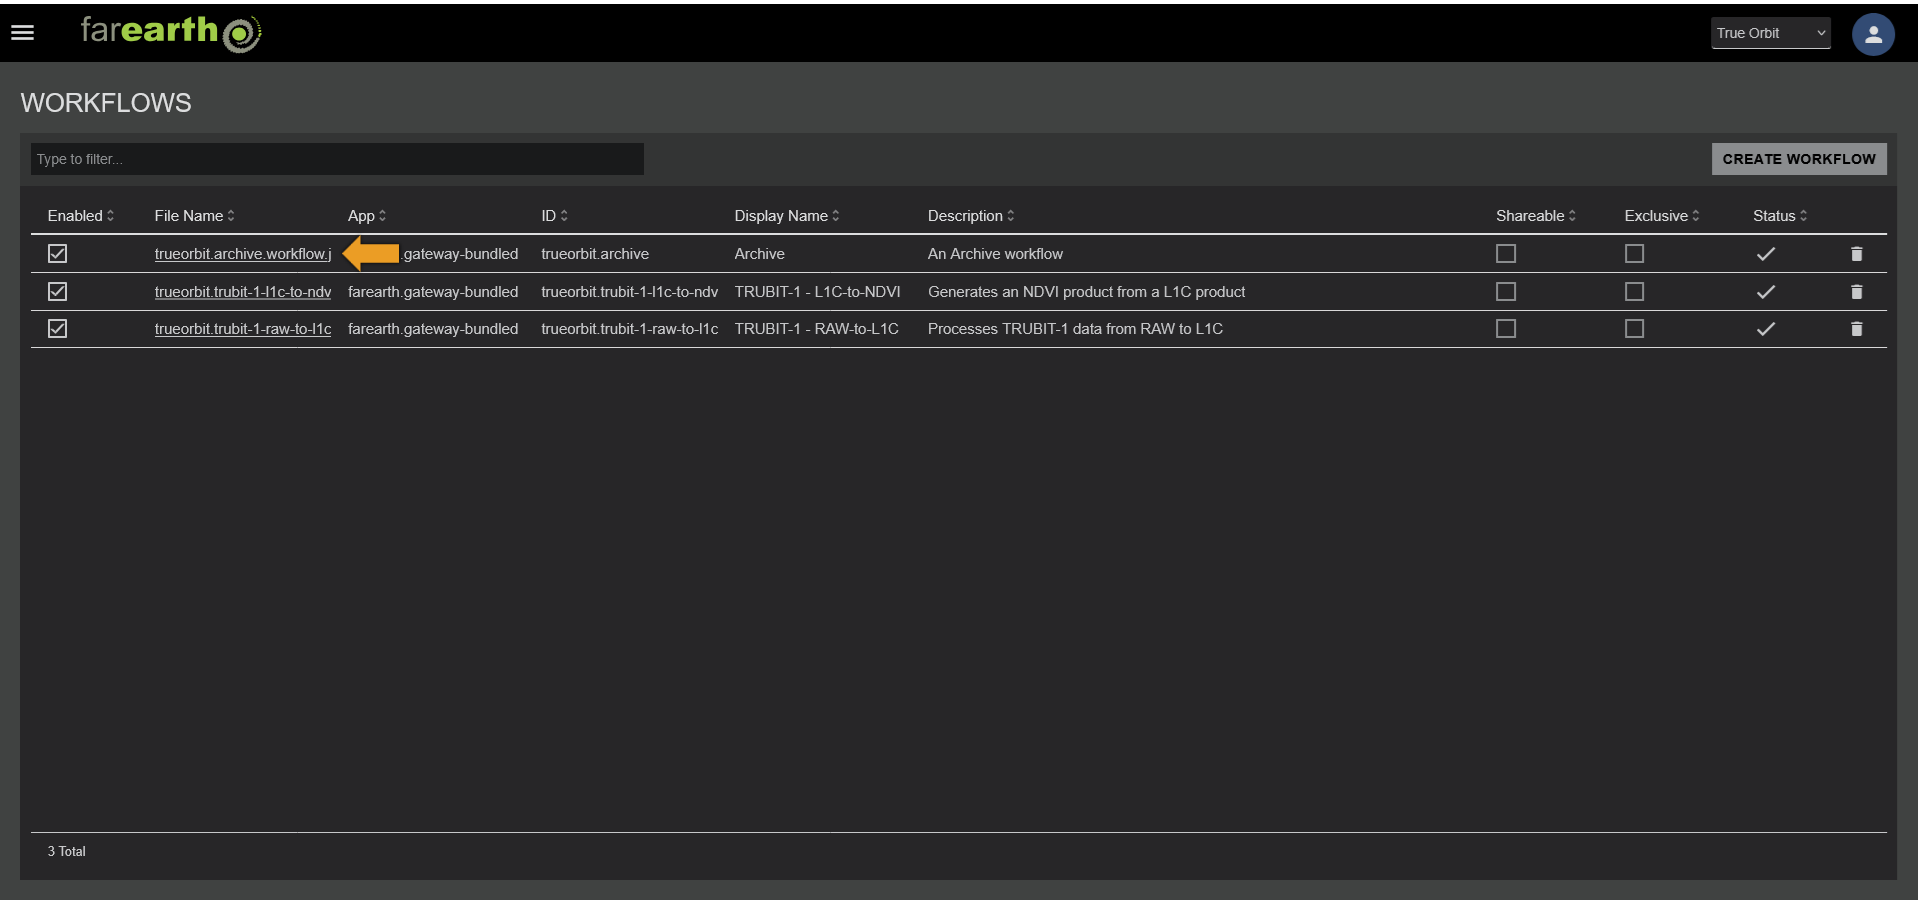
- Click the filename of the new Workflow to edit it
note
The filename of the Workflow will start with your FarEarth subscription ID, followed by the ID of the Archive you created, and ending with ".workflow.json".
STEP 8
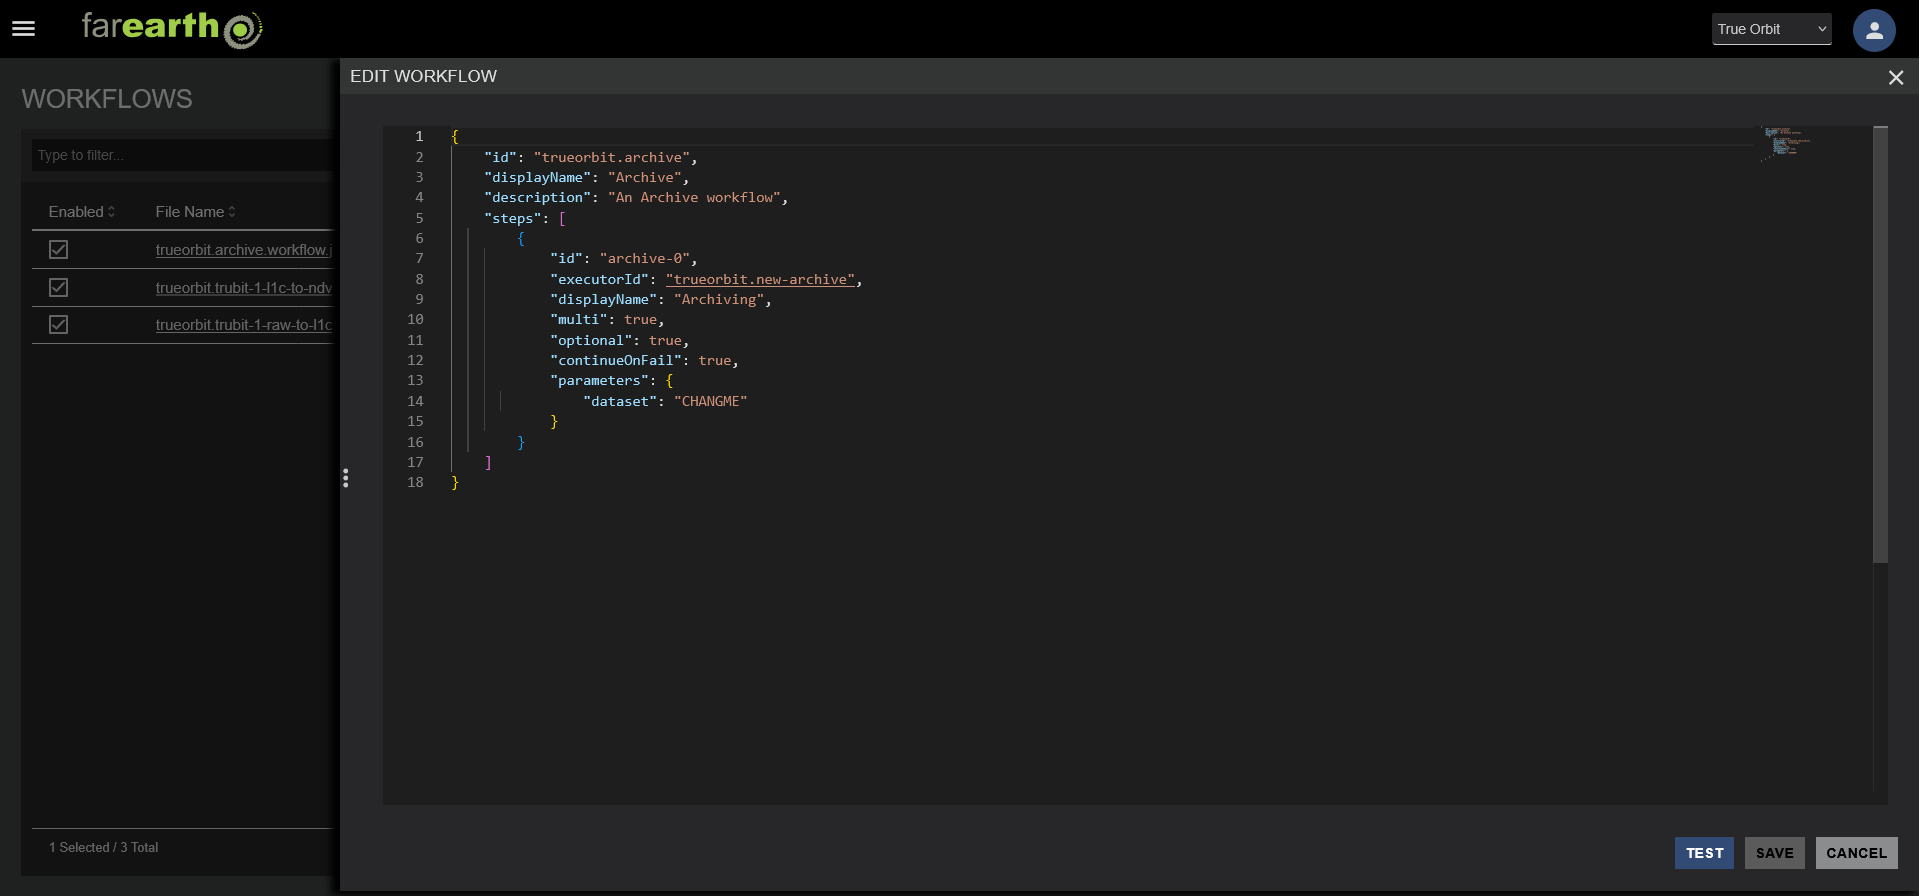
- Add a single archiving step to the Workflow
{
  "id": "<subscription-id>.<archive>",
  "displayName": "Archive",
  "description": "An archiving Workflow",
  "steps": [
    {
        "id": "archive-0",
        "executorId": "<subscription-id>.<archive-id>",
        "displayName": "Archiving",
        "multi": true,
        "optional": false,
        "continueOnFail": false,
        "parameters": {
            "dataset": "<dataset-id>"
        }
    }
  ]
}
caution
The id of the Workflow was configured in the previous steps. Do not change it here.
The id of the archiving step (archive-0 in the example) is the ID of the Archive that you created above.
Expected outcome
- You can upload data to the Archive using the Pickup point directly